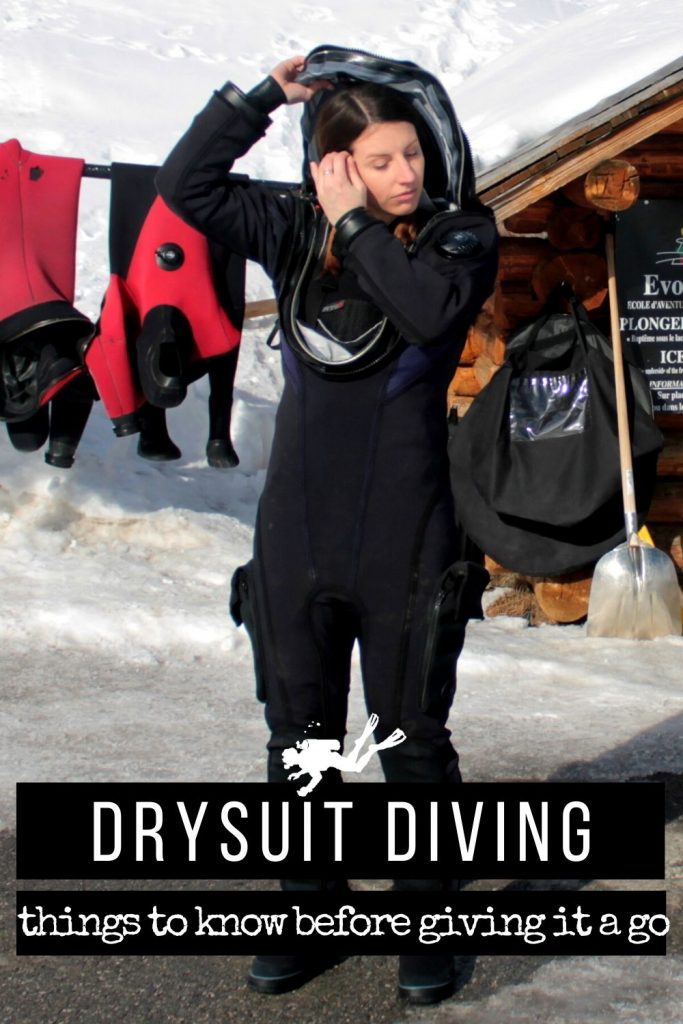
This post may contain affiliate links. It means I may earn a commission if you book or purchase something. This is at no cost to you and support this website. Learn more here.
As more divers look into local diving opportunities to halt a way too long surface interval, they all face the same struggle of potentially freezing once underwater. Indeed, for scuba divers in Europe or North America, local diving usually means cold water diving, especially in the winter months. But is freezing underwater inevitable? No, thanks to drysuits! This essential piece of any scuba diving equipment list for colder climates allow you to remain warm and toasty on every single dive. To start your journey in drysuit diving, there are a few things to consider; let me sum up all the things you need to know!
This article is geared towards tropical divers who are tempted by their local dive sites but still wary of cold-water diving. If you are already #TeamDrySuit, you might, however, find one or two nuggets that could enhance your drysuit diving experience, so stick around.
Drysuit diving 101


First, let’s review all the basics of drysuit diving by answering the essential “What, Why, Where, When, Who” questions.
What is drysuit diving?
As opposed to diving with a wetsuit, scuba diving with a drysuit allows you to go underwater without getting wet and hence stay warmer.
How dry, you may ask? Most models allow you to stay dry from neck and wrists to your feet (some models can offer optional dry gloves, more about this later).
How is it possible? Thanks to tight waterproof seals at the neck and wrists, in addition to an inflation system (similar to the BCD) that lets you add air inside, water can’t come in. Of course, this is the theory; check the paragraph about drysuit fitting.
If you are still following me, it means that you will scuba dive with two buoyancy systems to control underwater between your BCD and our drysuit. It may sound tricky, but with proper training, drysuit diving will make you a master at buoyancy control in the end.
Why go drysuit diving?
The first reason is to avoid turning into a human ice cube (hypothermia) when the water temperature becomes too cold for you. What level of water temperature you can start using a drysuit depends mostly on you.
You will find guides online telling you drysuits are to be used below 15°C or even below 10°C. In my case, I used to take 15°C as a reference temperature to decide to go drysuit diving. Now I have my own drysuit; I don’t think twice whenever the water temperature is below 20°C when diving locally.
For many divers, once the water is warm enough, there is something enjoyable about feeling in the water. To some extend, I can relate to that, but water temperature needs to be well above 20°C for me to think this way. As a result, some divers prefer using a wetsuit as long as possible, hence the 10°C limit you might read about sometimes.
The indirect benefit of scuba diving with a drysuit is to dive anywhere at any season. Nothing is stopping you any more from going scuba diving when you want, except maybe stormy weather!
Is drysuit diving for you?
There is a common myth going around that drysuit diving is only for experienced or professional divers. I can tell you, after living for two years in Scotland, this is not the case. When water is hardly getting above 12°C in the summer, scuba diving instructors teach their Open Water students directly in a drysuit because it just makes sense.
So if you are an Open Water diver with only a few dives under his/her belt, don’t be put off by the double buoyancy control thing. You can book as soon as you want a drysuit diving specialty course with the nearest dive centre to you. Drysuit diving is for everyone!
On the other hand, you indeed need to be aware that drysuit diving involves higher costs than diving in a wetsuit. More gear is required, and a drysuit costs much more than a simple wetsuit with its waterproof seals, inflator, and valve. Check if renting or buying your own makes more sense economically for you (drysuit rentals can go from 20€ to 80€ a day depending on the area).
If you are usually using your own gear when you go scuba diving, think about checking your regulator’s guaranteed water temperature range. Not all regulators can be used in cold waters without risking them going into free flow. One last important point: don’t forget you will need an extra hose going from your first stage to the drysuit inflator. When you buy a new drysuit, it is usually sold with it as a standard accessory.
Be aware that you will need to put more weight than you are used to with a wetsuit. As you need to compensate for the air inside the drysuit and potentially how fluffy your undersuit is, it is not rare to double the weights you would usually use. To give you an example, with a steel tank, I use 2 kg of lead with my 5 mm, I can go up to 4 kg with my 7mm, hood and gloves, but with my drysuit, I usually take 10 kg that I spread between my weight pockets and an additional weight belt.
Drysuit training: why the drysuit diving specialty is so useful


Without a doubt, I claim the drysuit diver specialty course could the most useful scuba diving specialty you could register to. Suppose you already pass the Peak Performance Buoyancy course during your Advanced Open Water class or as a dive specialty. In that case, I’m sure you know the difference it made to your comfort and confidence underwater. You learn how to better use your lungs by inhaling or exhaling longer or a bit faster, and then stop playing with the inflator of your BCD and stop being an air hog in the end.
Most of the drysuit diving specialty will teach you how to handle the double buoyancy issue and emergency procedures that go with it. I heard many people saying there is no need to follow this training before using a drysuit. Please don’t listen to them. Let an experienced scuba diving instructor guide you on how to use a drysuit safely. Besides, you won’t rent a drysuit in some countries without showing your drysuit diving specialty card (Iceland, for instance, and some dive shops in Scotland asked me it too). Knowing it’s only 1 day, 2 dives, why skip it?
I passed my drysuit diving specialty in a freshwater quarry in Western France. Guess who went right up to the surface because of the air stuck in her feet during the first immersion? I’m happy I could make mistakes in a shallow and safe environment and learn from them. Now, with experience, I can detect in a fraction of a second any unbalance in my buoyancy.
After you drysuit training, I recommend taking it easy (not too deep, no strong currents) for at least the 10 following dives. Your body will need some time to record all the sensations and indicators of things going right or wrong.
The training also includes how to efficiently use the release valve on the left arm of the drysuit to find neutral buoyancy or release the air when you ascend back to the surface. You will also practice how to plug/unplug your drysuit inflator’s hose while being fully geared up (less easy than you might think). Finally, learning how to avoid drysuit squeeze by adding the proper amount of air in the suit as you dive deeper will let you dive comfortably.
What should you consider when purchasing a drysuit?


If possible, try as many drysuits as you can through rentals before buying your first drysuit. It will help you understand what makes you comfortable or not and potentially find a model that perfectly fits you before considering custom-sized models.
However, depending on the location, rental drysuits are hardly available, or when they are, the rental cost, up to 80€ a day, added to the limited models available, can be disheartening. It was the main reason which decided me to invest in my own drysuit as soon as possible.
Drysuit prices from entry-range to full options models
If you are looking at brand new drysuits in shops, their price ranges from 700€ to 2,000€. The 7mm neoprene drysuits are usually the cheapest and a great option if you are looking for a budget solution to start with. Note 4mm compressed neoprene drysuits are slightly more expensive but offer a less buoyant solution that requires less weight to wear for similar thermal properties.
You can, of course, divide this cost by at least two by looking at the second-hand market. Check your favourite local market place websites such as Gumtree in the UK or Craigslist in Northern America; you can also find specialised Facebook groups where members sell their scuba diving gear. In this case, be extremely careful with the state of the zip and the seals, the most critical parts.
If you do the math, you will quickly see that you need to go diving more than once to make a reasonable investment return. Don’t forget to add to this cost the price of a decent undersuit (for icy waters, honestly ski fleece is hardly enough), hood, gloves and any additional accessory you may need (extra hose for your regulator, for instance). You can also get surprises like me, that your fins become too small for the booties of your drysuit. This is how I got a larger pair of fins, just for my Fusion drysuit.
Neoprene vs Trilaminated/Shell drysuits: what’s the difference?
While it is the first option you need to decide, beginners drysuit divers will usually opt for neoprene drysuit since the trilaminate or shell drysuits are the most expensive options. Since the neoprene drysuits offer similar sensations to wetsuits, they remain tighter to your body, hence improved hydrodynamics, it may feel easier to scuba dive with them. So it’s not such a bad idea for beginners. My first drysuit, the Aqualung Blizzard, is a 7mm neoprene drysuit.
Shell or membrane drysuits are made of a thin solid fabric usually made of three different layered materials, hence their other name, trilaminate drysuits. The multi-layered materials may include vulcanized rubber, layers of nylon, an inner layer of polyurethane, and some of the most resistant drysuits come with an outer layer of Cordura fabric. My second drysuit, the Aqualung Fusion drysuit, is a hybrid bi-laminate drysuit.
Contrary to neoprene drysuits, even if crushed, trilaminate drysuits do not offer any positive buoyancy or thermal insulation. Being much looser than the neoprene ones let you adapt the thickness of the undergarment to wear depending on the water temperature conditions. They tend to be faster to dry and, generally speaking, lighter and more compact to transport.


Socks or Boots: depends on your shoe size
Here is another essential point to check. If the drysuit comes with a sock system, don’t forget to buy the booties that go with it. The advantage of the sock drysuits is to allow divers to fit any size of booties on them. It is incredibly convenient for people who might have a smaller or larger shoe size than the average for people of their height.
In my case, with a size 40 (UK size 7), I have slightly larger feet than average which makes my Blizzard neoprene drysuit’s integrated booties a bit too small. I could solve this issue with my Fusion drysuit. Thanks to its sock system with scratches, you can let the Fusion booties, at your size, be attached to the drysuit like if they were integrated.
Generally speaking, if you can find a bootie size that fits, I’d recommend integrated booties since it’s quicker to put on, and it dries faster after diving.
Dry zip: front vs back
Honestly, for the moment, I haven’t seen any brand with low-quality zips (many manufacturers use the same provider for their waterproof zip, YKK/BDM). However, let’s say when you try the zip in and out, it must feel solid as you (or your dive buddy) will pull hard on it to make sure it’s perfectly closed.
You will see models with a back zip and others with a front zip. Both are equally waterproof; it is more a matter of personal preference. With a zip at the front, you can sometimes close the zip yourself, or at least watch how your dive buddy is closing it.
With a zip at the back, you have to trust your dive buddy, even if it’s possible to check the end of the zip by turning your head toward your shoulder. One advantage of the back zip is that I feel this is more comfortable to wear on the shoulder blades. Note I haven’t tried yet the shell drysuits, which have a front diagonal zip; they look rather convenient.


Seals: neoprene, latex or silicon?
Together with the zip, the neck and wrist seals are the most critical parts of a drysuit. The quality of their material matters, but if they are even a bit too large, they won’t be able to do their job to keep you from being flooded with icy water. Seals must not strangle you either; make sure they won’t restraint blood circulation.
You will usually find three types of materials for the seals:
- Neoprene: This is the most solid option. They are unlikely to break even if it’s not impossible if you pull too hard on them. The drawback mainly comes from their size, which is usually proportional to the size of the drysuit. It can be a problem for people with a small neck and wrists compared to their size.
- Latex: These seals usually come in a cone shape you can cut to your size. While they perfectly adhere to your skin, they are fragile and can break easily. Be careful not to wear any sharp rings or earrings or using them with long nails. As latex seals are glued to the drysuit, if you break one before a dive, you won’t be able to replace it right away.
- Silicon: Basically, all the advantages of the latex seals without the potential allergy issue plus slightly more solid. Silicon seals can be found with the SI Tech system, which uses a clips system with plastic rings. It means if you break one before a dive, you can replace them in minutes and save a dive (if you thought about carrying spare seals).
Gloves: wet and dry options
Most drysuit divers will use wet gloves because that a straightforward and cheaper solution. I own thicker 4 mm neoprene gloves and even tried 7mm mittens but the lack of dexterity was an issue for me (especially when trying to use an underwater camera). So if the water is not too cold (let’s say down to 10°C), I will wear my standard 2 mm gloves.
I had the opportunity to try dry gloves when going ice diving. So I can attest this is indeed a great solution if you can afford the extra expense. Be aware not all drysuits can be fitted with these as you need a special ring to clips them. With my Fusion drysuit, which uses the SI Tech seal system, I can get an adaptor to fit dry gloves if I wanted to.
Dry gloves usually use a rubber material similar to washing up gloves. You wear fleece or wool gloves below, but the result is surprisingly excellent regarding dexterity when diving in cold water.


Undersuit: the most underrated piece of drysuit diving gear
The colder the water, the thicker or warmer the undersuit you will need.
If you are using a neoprene drysuit, you have already some thermal insulation, the same way a wetsuit does. In this case, you won’t need such a thick undersuit, especially since you won’t necessarily have space for something too thick. When the water temperature is mild, I can only use a rashguard and leggings under my neoprene drysuit. When the water temperature drops well below 15°C, I use a thin but warm bodysuit. I used a Sharkskin suit, but you can also have a look at the CeramiqSkin t-shirt and leggings by Aqualung.
When you are using a shell drysuit, you have no thermal protection at all. With my Fusion drysuit, I used the warm and fluffy Fusion undersuit. However, remember one thing: the fluffier the undersuit, the more buoyant you will be, the more weights you will need.
In addition to a proper undersuit, investing in socks for drysuits changed my life in icy water. I used the Arctic models from Fourth Element. Before them, my feet were so hard from the cold, like ice cubes, that it was painful to walk off the boat after the dive.
Trying on a drysuit: how to find the right fit?


There are now many drysuit models for all sizes, men like women models, and those with a comfortable budget can even order a custom-sized drysuit.
On the entry-level side of the spectrum, it’s an “all or nothing” deal with neoprene drysuits. Try as many as you can to check if one can fit your height, weight, shoe size and if neck and wrist seals are small enough for you. You may need to try a few before finding the one.
With drysuits allowing a couple of customisations (size of seals, bootie size, etc.), you may need to stretch your budget a bit, but it won’t be as expensive as a full custom-size drysuit. This is the case of my Fusion drysuit, which was also available in a women’s cut which is both more comfortable and more flattering (not that I care, but…).
In the end, it comes to the size of the seals. This is the part I struggled the most with in my early years of drysuit diving, with the negative outcome of having freezing water entering my drysuit. Now I use the silicon SI Tech system this nightmare is over. As a rule of thumb, if you can put your fingers too easily between your skin and the seal, it’s too big.
The p-valve issue: because drysuits are meant to stay dry…
If you want a good laugh, you came to the right paragraph. There is much joking around between those who say they pee in their wetsuit and those who don’t dare to say it. Now, think about it. There is no way you can do this in a drysuit!
The urge you feel about going to the bathroom underwater is a physiological phenomenon called immersion diuresis. My experience in colder water is that it gets even worse. Depending on the setting of dives, shore or boat diving, it can easily be 2 hours in a drysuit without any possibility to go on a technical break.
If you knew the number of ridiculous anecdotes I have because I drank way too much coffee before scuba diving in a drysuit. The penguins of Ushuaia must be still blushing of when I had to rush more than usual to the surface to hopefully find a rock to hide behind.
Here come the p-valves as the ultimate solutions for divers going on long dives, especially tech divers doing deep wreck dives or cave divers. What sounds initially like a fantastic idea can quickly become a nightmare once you hear what it involves. Models for men and women are working in a much different way. Here are some video links to the male p-valve and female she-p valve; I let you explore the details and see if it’s something that would work for you.
Because p-valves are not my cup of tea (pun intended), I seriously consider trying adult diapers because why not if it means staying better hydrated before and right after the dive. If you still didn’t know that you sometimes have to leave your pride behind with scuba diving, now you know.
Bonus: my optimized drysuit diving gear up routine


The first times you’ll go drysuit diving, you may lack efficiency while gearing up. The usual culprits? Bulkier equipment and thicker gloves! After 10 years of scuba diving with a drysuit, here is my suggested order for gearing up to make things smooth and efficient:
- Once it’s time to close your drysuit, check the zip is perfectly closed. Now check again (divers jumping in the water with drysuit zip open happened in front of me more than you think).
- Adjust your dive computer on your wrist (you might need an extension band with some drysuits).
- Put your weights on, either with a belt or a harness, your weight pockets, or a mix of the two (my favourite solution to balance the 10 kg of lead I carry, 6 kg in my weight pockets and 4 kg on a belt).
- Check your tank is open; open it if necessary.
- Put your fins on close to where you’ll sit to put your BCD on.
- Get in your BCD, get the drysuit inflator hose below your left arm before buckling up and adjusting the straps.
- Connect the hose of your drysuit inflator. Make sure it’s correctly connected by gently pulling on it. Put your release valve on your left arm in a fully open position (turn it anti-clockwise).
- Put your hood on and then your mask.
- If you are right-handed, put your left glove first and finish with the right glove. Do the contrary if you’re left-handed.
- Do a buddy check, and you’re good to go; safe bubbles and have fun!
I tried to sum up my best tips from my 10 years of drysuit diving in France, Scotland but also in Argentina, Iceland and Japan. If something is still missing, please let me know in the comments.
If you enjoyed this post, subscribe to WAD Newsletter to receive the latest posts directly into your inbox.
PIN IT FOR LATER